How a Parachute Actually Opens: The Split-Second Physics of Canopy Deployment
Inside the Split-Second Transformation from Freefall to Flight
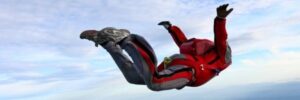
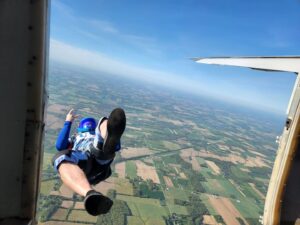
At roughly 120 mph in stable freefall, the air feels loud, forceful, and continuous. Then the parachute deployment sequence begins, and within a few seconds that powerful rush changes into a controlled canopy ride. The transition is one of the most carefully engineered moments in skydiving. Understanding how a parachute works makes the experience easier to visualize and removes much of the mystery for first-time jumpers.
A modern parachute does not simply burst open like a sheet thrown into the wind. That would create an extreme deceleration and place unnecessary stress on the jumper, harness, lines, and fabric. Instead, deployment is staged through a coordinated sequence involving drag, line extraction, slider resistance, and gradual inflation. From the moment the pilot chute enters clean airflow to the moment the canopy becomes a pressurized wing, the process typically unfolds over about three to four seconds, depending on the equipment, deployment altitude, body position, and airspeed.
The Architecture of Modern Deployment Gear
The parachute system is a complete mechanical and aerodynamic package, not just a folded canopy. The container holds the packed main parachute and reserve. The deployment bag, commonly called the D-bag, contains the folded canopy and suspension lines in a specific arrangement. A bridle connects the deployment system to the pilot chute, which is the small fabric parachute that creates the initial extraction force. The jumper is connected to the canopy through risers, lines, and a harness designed to distribute opening forces across the body.
Every component has a defined job, and the sequence depends on those jobs occurring in the correct order. The pilot chute must catch air before it can pull the bridle. The bridle must extract the deployment bag from the container. The lines must extend and become taut before the canopy is allowed to inflate fully. Modern packing methods, line stows, closing loops, and container flaps are designed to control that progression and reduce the chances of premature inflation, line entanglement, or uneven extraction.
- Container: Protects and holds the packed main and reserve systems.
- Deployment bag: Keeps the canopy and suspension lines organized during extraction.
- Bridle: Transfers force from the pilot chute to the deployment bag.
- Pilot chute: Creates drag in the airstream and begins deployment.
- Suspension lines and risers: Connect the jumper to the canopy and transmit steering and lifting forces.
- Slider: Controls the rate at which the canopy fabric spreads and inflates.
Small details matter at the speeds involved. Rubber line stows hold the suspension lines in compact groups and release them progressively as extraction continues. The bridle and pilot chute are sized to create enough drag to overcome container resistance, but the system is not intended to produce an uncontrolled, explosive opening. Reserve systems also include carefully regulated deployment arrangements, and the entire rig must be maintained, packed, and inspected by appropriately qualified professionals. An Automatic Activation Device, or AAD, provides an additional emergency layer by monitoring altitude and descent conditions and initiating reserve deployment when preset criteria are met.
Second by Second Deployment Breakdown
Deployment is best understood as a chain of short events rather than a single dramatic action. The exact timing varies, but the order remains consistent. Once the main deployment handle is activated, the jumper is no longer relying on one sudden movement. The equipment converts airflow into a series of controlled mechanical actions.
- Second 0: The pilot chute is thrown or released into clean airflow, where it expands and creates drag.
- Second 1: The bridle transfers that drag to the main container and extracts the deployment bag.
- Second 2: The suspension lines extend and release sequentially from their heavy-duty rubber stows.
- Second 3: The canopy leaves the deployment bag, the slider begins moving down the lines, and the cells start to pressurize.
At the beginning of the sequence, the pilot chute is intentionally placed in undisturbed air behind the jumper. Its purpose is not to slow the entire fall immediately. It first creates enough drag to pull the bridle tight. The bridle then extracts the deployment bag from the container, allowing the organized line groups and canopy fabric to move into the airstream. This staged extraction is why a properly packed system does not behave like a loose parachute thrown from an aircraft.
As the lines extend, the bag remains attached in a way that controls how the canopy leaves its enclosure. The line stows release in order, helping prevent the canopy from inflating before the suspension system is properly extended. Once the lines are nearly taut, the canopy fabric begins to slide out of the bag. The jumper may feel a firm opening force and a change in body position as the system brings the body from a head-down or horizontal freefall attitude toward a more upright canopy position.
The Ingenious Physics of the Slider
The slider is one of the most important devices in a modern ram-air parachute. It is a small fabric panel that sits near the canopy during packing and is threaded onto the suspension lines. Without it, the canopy could spread and fill far too quickly. The result would be a severe deceleration, excessive force on the harness, and potentially damaging loads on the canopy and lines.
After the lines extend, the slider is pulled downward toward the risers by aerodynamic resistance. It acts like a temporary air brake between the canopy and the jumper. The fabric cannot fully spread until the slider has moved a significant distance down the lines, so the cells inflate progressively rather than all at once. This creates the familiar sensation of a strong but manageable opening instead of an abrupt stop.
The difference between uncontrolled inflation and slider-controlled deployment can be described in terms of deceleration. A jumper falling at about 120 mph who were stopped almost instantly would experience a violent change in velocity. A controlled opening distributes that change over time and distance. The exact force depends on canopy size, body position, equipment settings, air density, opening altitude, and other factors, but the central principle is consistent: extending the deceleration reduces peak loading.
| Deployment condition | What happens | Why it matters |
|---|---|---|
| Unhindered inflation | The canopy spreads and fills extremely rapidly | Creates high peak forces and unnecessary equipment stress |
| Slider-controlled inflation | The slider meters the spread of the canopy over several seconds | Produces a smoother, more manageable deceleration |
| Full inflation | The cells are pressurized and the canopy stabilizes as a wing | Allows steering, braking, and controlled descent |
The slider also works with canopy design and packing technique. A canopy may have seven or nine cells, depending on its construction, and the fabric, line trim, slider size, and packing method all influence opening characteristics. That is why equipment maintenance and professional rigging matter. The slider must be correctly positioned, the lines must be routed properly, and the canopy must be packed according to manufacturer and dropzone procedures. A smooth deployment begins long before the aircraft takes off.
Ram-Air Inflation and the Transition to an Inflatable Wing
Once the canopy has cleared the deployment bag, its open leading edges, or noses, face the relative wind. Air enters the front of the canopy and fills its internal cells. These cells are formed by upper and lower fabric surfaces connected by vertical ribs, creating a hollow aerodynamic structure. As pressure builds, the canopy becomes firm and takes on the shape of an airfoil rather than a flat piece of cloth.
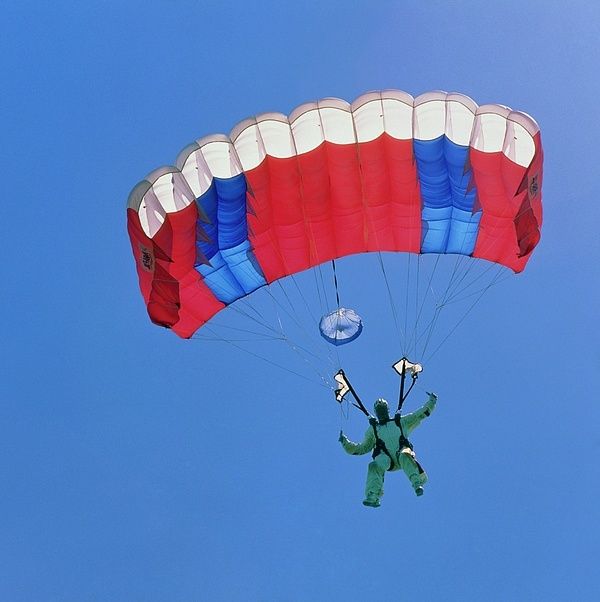
This is the point at which the parachute begins behaving more like a small glider than a traditional round parachute. Air moving around the curved upper surface and lower surface creates a pressure difference that produces lift. The canopy continues descending, but it also moves forward through the air. The jumper can use the steering toggles to turn, slow the forward speed, and adjust the flight path for landing. The parachute is not merely resisting gravity; it is converting the airflow produced by the descent into a stable, controllable flight system.
- Open cells capture air: Relative wind enters the canopy through the front openings.
- Internal pressure builds: The ribs and fabric hold the air and form the airfoil.
- Lift and drag develop: The canopy slows vertical descent while generating forward movement.
- Stability improves: Full pressurization gives the wing predictable handling.
- Steering becomes available: Toggles alter the canopy’s shape and direction.
During a tandem jump, the student does not manage this sequence independently. The instructor operates the system, monitors the canopy, and conducts the post-opening checks. Solo students learn the same principles through formal training, including how to recognize a properly inflated canopy, identify line twists or other malfunctions, and respond according to established emergency procedures. The important point is that a canopy that appears overhead is not automatically the end of the deployment task. The jumper must still confirm its condition and controllability.
A standard post-opening check includes looking at the canopy’s shape, confirming that the lines are organized, checking for twists, and testing whether the parachute turns and slows as expected. If the canopy is not flying correctly, the jumper follows the procedures taught by the instructor or training program. Reserve parachutes, AADs, inspections, and repacks provide layers of protection, but none replaces proper training, equipment checks, and decisive action when required.
Taking Command of the Sky with Confidence
The opening of a parachute is predictable because it is designed as a sequence of controlled events. The pilot chute creates the first drag, the bridle extracts the deployment bag, the lines extend in an organized pattern, the slider regulates inflation, and the ram-air canopy becomes a pressurized wing. What feels like a dramatic change from freefall to quiet flight is actually the visible result of carefully managed aerodynamics and mechanical engineering.
For a first-time jumper, the most useful response after opening is calm observation. Look up, check the canopy’s shape, inspect for line twists, and confirm that the parachute responds to control inputs when appropriate. Once those checks are complete, the sensation changes from the intensity of freefall to the calm of canopy flight. With professional instruction, maintained equipment, and respect for the procedures, you can trust the system while staying actively engaged in the flight ahead.